Building a Retaining Wall
Building a Retaining Wall:
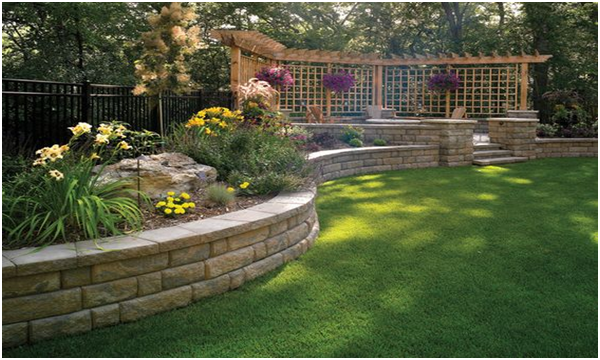
Building a retaining wall can be a big investment of time and money and it will help to reduce erosion, improve drainage and create usable garden space. Following are some useful tips and tricks to start with own retainer wall along with professional grade.
Prepping Building Site:
It is very first step to make a retaining wall. For this part some things need to be kept in mind as:
- Planning properly for the layout of the site and the place with the help of stakes and string, levelling off to be sure about the even height and use the tape to measure the even length.
- Exclave the site by using a shovel, dig a trench along the line to be laid out. It should be slightly wider than the blocks to be used in wall.
- Temp the soil level and lay down a paver base.
Laying the Foundation of Retaining Wall:
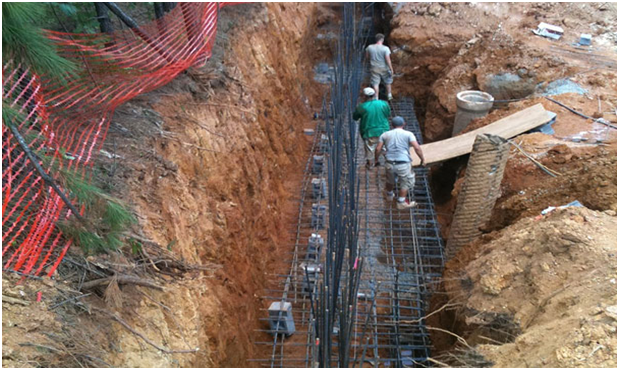
- Start the process by laying the foundation. These are most critical blocks in wall. If they are not level then can make the whole project of wall look less than professional
- Always start at the most visible edge of the wall, adding gravel or crushed rock to level the stone, if necessary.
- Cut off the top tongue of base stones if necessary.
- Use rubber mallet and coarse sand to level off the first layer of blocks, completing the entire foundation.
- If necessary cut individual blocks to complete the first layer by simply marking them at the appropriate length and cutting with a mason’s saw.
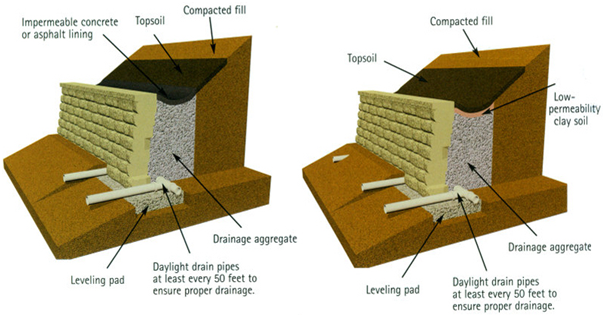
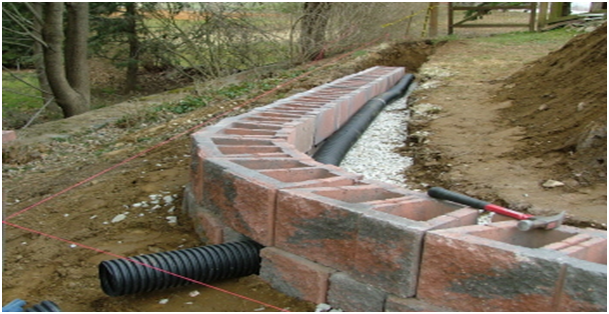
- Use crushed stone or gravel for backfill on first layer of blocks and place the filter fabric over the backfill.
- Sweep the first layer with a broom to free the wall from dirt or dust.
Completing the Wall:
In this step of retaining wall we will follow some things like:
- Start the second layer of wall with a staggered pattern so that the top layer seams are offset with the bottom layer.
- After the time a layer has been provisionally laid out once, apply the recommended adhesive to the bottom blocks and fit the top block overhead.
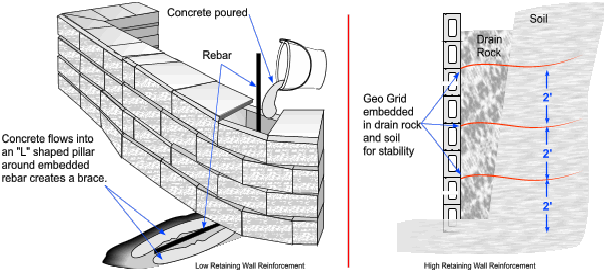
- Add drainage pipes to the retaining wall is atlist of 2 feet or taller than it.
- If have desire can add topper stone
Place Topsoil in Basin that is created by the Retaining Wall:
After this process wall is ready to be enjoyed after few given steps below and Plants, vines or flowers can be added to decorate.
- Usually Retaining walls thought of as utilitarian but it can be used to create beautiful outdoor living spaces and incorporate multi user spaces.
- Retaining wall should not be perfectly straight. Some texture, curve or some designing by the use of garden hose or large rope to set the layout of curve can make the wall more beautiful.
- Smaller retaining walls can be planned easily but large height walls may need an engineer’s touch.
- Besides offering a consistent look, manufactured blocks and stones offer structural integrity an even base.
- By creating a Solid base and proper planning for Drainage Retaining wall can be more durable. For each course of stone and blocks be sure to check the level also, this will help to maintain a sturdy and balanced wall as well as will give even and consistent look.
- Add cap blocks to the top row of a block or stone retaining wall, it will give finishing touches to the top.
The following two tabs change content below.


Sanju kmr
I am a Search and Social Media enthusiast who loves exploring the true potential of Web 2.0 and Social Media. If you want to post your article or blog on our website related to Home Improvement, interior design, home decor, lighting, fencing, blinds etc. Get in touch with us.
Latest posts by Sanju kmr (see all)
- What Makes Ceramic Basins a Top Choice for Homeowners? - March 17, 2026
- How to Grow a Successful Real Estate Business in 2026 - February 20, 2026
- Should You Renovate or Move? A Practical Guide for Homeowners - December 2, 2025