Window Installation: What to Expect During the Process
Welcome to a world of clearer views and improved energy efficiency – the realm of window installation. Whether you’re considering a window replacement or diving into commercial window installation, understanding the process is key to a seamless and successful project. In this blog post, we’ll shed light on what to expect during the window installation journey.
1. Preliminary Consultation
Before the hammers start swinging, a preliminary consultation sets the stage. A professional window installer will assess your needs, inspect existing windows, and discuss your preferences. This step is crucial for determining the type of windows that best suit your space, considering factors like energy efficiency, style, and materials.
Your contractor will first take measurements of the existing window openings in order to select an ideal window size and make a specific order from a window manufacturer. This ensures a weather-tight seal, long-term comfort, and precise fitting for optimal weatherproofing and weather-tight comfort.
The team will also clean and inspect the opening for signs of rotten wood, repairing it as needed to make room for a new window installation. In addition, they will install exterior trim (known as window stops ) around it for protection and an aesthetic finish.
Fill nail holes with wood putty as needed, paint or stain the trim to match the color of your house, and ensure an easy installation process by clearing away furniture, breakables, and plants in the area near your window to provide easy access. An experienced window installer should guide you through the replacement window installation process and answer any of your queries, providing peace of mind to ensure a successful project.
2. Window Materials Unveiled
The beauty of your windows lies not only in their transparency but also in the materials they’re crafted from. From classic wood to low-maintenance vinyl and sleek aluminum, window materials play a vital role in aesthetics, durability, and energy efficiency. Understanding the characteristics of each material empowers you to make an informed choice tailored to your preferences and budget.
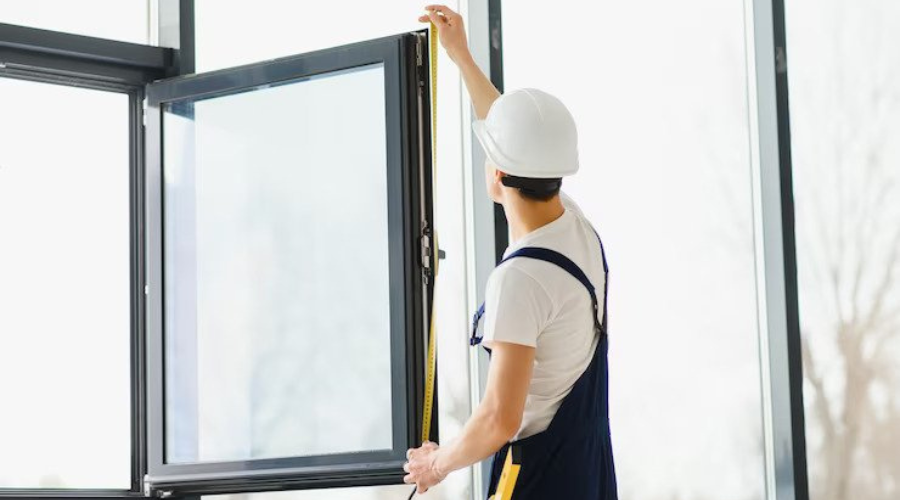
3. Measurement and Customization
Once materials are chosen, precise measurements take center stage. Every window opening is unique, and accuracy is paramount to a snug fit. The installer will measure dimensions meticulously, ensuring your new windows are custom-tailored for seamless integration into your home or commercial space.
Measuring your window opening might seem like an easy task, but accuracy is of utmost importance when doing this task correctly. Even small errors in measurement could compromise its fit and affect performance – that’s why we recommend professional measurements as part of your free consultation session.
To measure height accurately, hold your tape measure taut and take two diagonal measurements from within your home – one starting in the upper right corner where the head jamb meets the side jamb and another from where the side jamb meets the sill. Make sure these measurements are within 1/4-inch of one another so you can select the shortest for height measurement purposes – this will help ensure new windows fit seamlessly within existing frames.
Measure the width by taking measurements on three spots from the head jamb (the horizontal board above your window) to the sill in three separate locations – left, middle, and right sides). Record all three measurements; use the one that measures least when ordering your replacement windows.
4. Removal of Existing Windows
Out with the old, in with the new. The removal of existing windows is a carefully orchestrated dance. This step demands both precision and care to avoid damage to surrounding structures. Professional installers are equipped with the expertise to execute this phase seamlessly, leaving your space ready for the fresh breeze of change.
When performing full-frame replacement, the crew will remove your old windows from the exterior and use shims to fill any gaps between your frame and rough openings that might arise during installation. Before commencing installation, a high-quality contractor should remove your old windows carefully and dispose of debris properly to lower environmental pollution risks.
5. Installation Day – Precision in Action
Commercial window installation can be a tedious and complex process that necessitates special tools, techniques, and materials. Professional contractors possess all of these assets to deliver homeowners high-performing windows that will stand the test of time.
On installation day, your crew will show up at your door and conduct a walkthrough of the house to ensure everything runs according to plan. They will describe their window replacement process in detail – including what they plan to do to each window and for how long. Drop cloths will also be laid out around areas where work will take place to protect draperies or window treatments that could fall on them during installation, along with plastic covering furniture or plants in window sills or ledges that may get covered during this process.
Installation day marks the crescendo of the process. With window materials and measurements in hand, the installation team will skillfully place your new windows. Attention to detail is the guiding principle, ensuring a snug fit, proper insulation, and secure anchoring. Quality installation not only enhances the aesthetic appeal but also maximizes energy efficiency.
Older windows often include sash weights or springs to keep them balanced. To prepare the window for installation, contractors will cut their ropes and allow the weights to fall into their respective pocket pockets.
Installers will test their new windows to make sure they fit perfectly into their opening and don’t leave gaps that could allow water leakage or energy loss. Pans will be added at the bottom of frames while flashing tape will cover perimeter and edge areas to create water resistance and increase energy savings.
Window installers typically begin by cleaning out the opening and applying flashing tape to prevent moisture infiltration. Next, they inspect the sill to make sure it’s level and free of bowing before shimmying as needed and sealing any exposed areas around the window with sealant if required.
If you’re installing full-frame replacement windows, your contractor must first strip down to rough framing before beginning installation of trim and exterior cladding. This may add an extra day or so to the project; therefore, it is wise to discuss any weather concerns with them beforehand and inquire as to their policy on clean-up, hauling away, and disposing of your old windows. Also, keep copies of individual labels as well as paperwork that comes with them just in case any issues arise that require contacting the manufacturer or installer directly.
6. Sealing the Deal – Weather Stripping and Insulation
Once installed, installers will sand and paint your jambs smoothly before applying primer and paint. Next, they’ll install new weather stripping and caulk around your window(s) and add brickmould if you’re installing full frame replacement windows (but you won’t require one for insert pocket installations). Caulking and insulation help promote energy efficiency by limiting outdoor noise infiltration and saving you money on energy bills.
To fortify your windows against the elements, weather stripping and insulation become the unsung heroes. This step ensures a tight seal, preventing drafts and maintaining a comfortable indoor environment. Proper insulation also contributes to energy efficiency, potentially reducing your utility bills.
They’ll use elastomeric caulk to seal gaps less than 1/4 inches wide on the casing and apply foam rubber backer rods and two continuous beads of caulk around each window on the interior trim to create an airtight seal. Finally, they may add new insulation where necessary to complete this job properly.
At this phase, window installers remove any existing fiberglass from sash-weight pockets, bore 3/8-inch-diameter holes at both ends of each side jamb leading to the sill, and inject 3/8″ dia insulating foam into these spaces. They’ll also inject foam into any head jamb pockets as well as top and bottom interior frames for additional moisture protection before finally adding exterior trim pieces tailored specifically for your home’s design.
7. Finishing Touches and Clean-up
Installation crews use levels to ensure that windows are level within their opening and secure in place, inserting shims between meeting rails to stop bowing frames from bowing too much. As the final screws are tightened, attention turns to the finishing touches. Trim and caulking add a polished look, enhancing the aesthetic appeal of your new windows. A meticulous clean-up follows, leaving your space as pristine as your freshly installed windows.
Once all the hard work is done, our crew will do everything in its power to clean up and haul off your old windows, install any necessary new trim pieces, and caulk around window openings to ensure that your new windows function optimally and reduce energy loss.
Before departing, the crew will inspect their work and ensure everything looks satisfactory. They’ll test the sash to ensure it opens and closes smoothly and apply a bead of caulk to reduce drafts around its inside edge casings.
Conclusion
The window replacement process is a transformative journey toward a brighter, more energy-efficient space. Armed with knowledge about materials, measurements, and the meticulous steps involved, you’re better equipped to embark on this home or commercial window installation upgrade. So, as you peer through your newly installed windows, enjoy the clarity – not just of the view outside but of a successful window installation process. Cheers to clearer perspectives and brighter spaces!
Sanju kmr
Latest posts by Sanju kmr (see all)
- What Makes Ceramic Basins a Top Choice for Homeowners? - March 17, 2026
- How to Grow a Successful Real Estate Business in 2026 - February 20, 2026
- Should You Renovate or Move? A Practical Guide for Homeowners - December 2, 2025